Google Docs Chat: Changing a Distraction into a Powerful Tool

The Ed Tech team at my school has been sipping the Google Apps kool-aid for a long time. I still remember how enchanted I was the first time that four of us in different parts of our geographically large school were collaborating in real time on a budget document. The chat window was open and comments were being added.  It was powerful, effective collaboration.


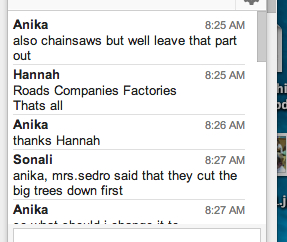
Our elementary students dearly want to chat while working, but that usually comes at the cost of their productivity.  During work time, some are irresistibly drawn to filling the chat box with illuminating sentences such as these:

I like cheese!
Hiiiiiiiiiiiiiiiiiiiii!
I am awesome!!!!!!

Today I was happy to have a chance to teach a grade 4 class how to effectively use the communication tools in Google Docs. In their homeroom they have been working in groups to research endangered environments.  They took notes in a variety of formats, some on posters, some on sticky notes, and some on iPads. Our next step was to have the group members combine their notes into a reference document.  As their final step, each student will use their group’s reference document to create their own Haiku Deck presentation which will be presented and then posted on their blog.


Before class we set up a blank document for each group in a collaborative folder in Google Docs.  That saved time and put the documents where we could easily find them.


To start class I explained that they were going to have a chance to use Google Docs in the way that adults use them on the job. They were going to make one document that contained the notes for their entire group. To help them work efficiently, they were going to use the chat box and the comments feature.


I opened one of the team documents and had a student open the same document on her computer so we could review how you can tell where someone else is working in a document.  Next, I typed some sentences which included errors. The student modeled correcting those, since that is one way people collaborate.  After that I used the comment feature to ask a clarifying questions about something.  Finally, I used the chat to ask her a question.

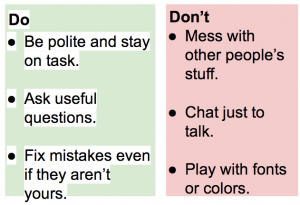
I gave the students these guidelines for their work.

Screen Shot 2014-03-31 at 1.38.48 PM


Knowing that the chat feature  could prove to be too distracting, I also let students know that if needed, we would move them to Mircosoft Word and then we could paste their notes into Google Docs at the end of the period.


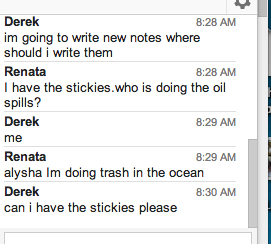
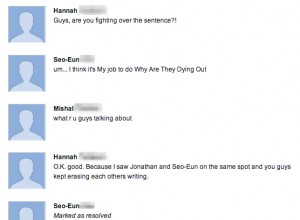
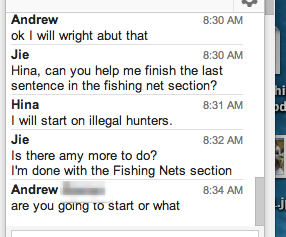
Students took the assignment very seriously.  They got right to work.  At first the chats were full of organizational questions about who would do what and where it would go in the document.

derek


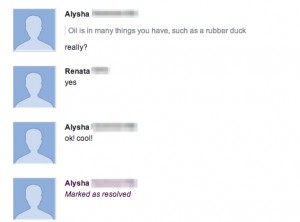
After they had been working for a while, the chat discussion turned to the contents of their document. They asked clarifying questions and shared new information with the people writing those sections.
monosnap-window title-5         monosnap-window title-4


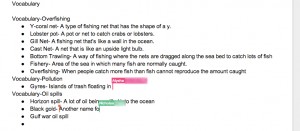
It became clear as the students worked that they were taking the time to read over each others writing. You could tell by the colored cursor marks that sometimes one student was following behind making corrections.


monosnap-window title-6


It was a highly productive 35 minute work time.  All of the documents were well-underway by the time we logged off the computers. One highly distractible student commented that he only managed to add two notes.  I was not too worried about that because he really was following the chat and reading what people were writing.  He was more focused than I’ve ever seen him before and I suspect he learned quite a bit from what the other children were writing.


At the end of class we debriefed the process. Here are their observations.

What went well:
  • We worked together well and we used the chat to help us figure out how to change what wasn’t right.
  • I asked for help and people responded positively.
  • Sometimes kids asked for something and they got it.
  • We could do what we did best to help our group.
  • On the chat we figured out what each person should do. Then on the last part we all had a job and we got it done.
  • Sometimes it worked better to walk over and talk to the person.
What was hard or needs improvement:
  • There were so many people doing things, like adding spaces and that made my words go down to a different page.
  • It was confusing to have so many people on a section while you were on trying to correct it.
  • It was hard because I had to watch the chat and do my own work.


I was able to tie that last comment back to the start of the school year. During our digital citizenship lesson we used Common Sense Media’s Digital Passport games. One lesson from the Twalkers game focused on the challenges of multi-tasking.  The children all lit up as they made the connection. A few students shared their successful strategies such as only checking the chat box occasionally.


Overall I was very pleased with the lesson.  It changed beguiling features from distractions to tools. The students had more chance to interact and their interactions were on task. To my delight, the students continued to use these tools later in the morning.  They  must have resumed working in their classroom using their iPads.  Since the chat is not available in the Google Drive app, students started using the commenting feature instead to ask questions regarding specific portions of the text.

monosnap-window title-7                 monosnap-window title


I hope this lesson is sticky.  I will be watching to see if in the future, they revert back to the I like cheese comments or if they continue to use the chat and comments productively.


How do you tame the distractions in Google Drive?  Please share strategies that are working well for you.


Do You Travel with Friends?

Over the past decade I’ve had the delight of traveling with extended family and friends a few times.  The only negative part of the trips were tracking expenses as we were traveling.  When I saw the Let’s Settle Up Later app on the Apps Gone Free app, it sounded like just what I needed.

icon

Last week my parents visited us. We spent time sightseeing in Singapore and Bali.  I used this app to track all of our expenses from taxi rides to concert tickets to restaurants. It worked beautifully.

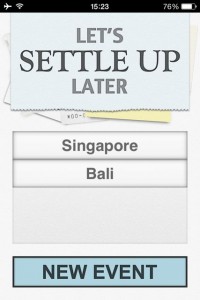
To get started, I created an event. In this case, I created an event for Singapore and a different event for Bali since they have different currencies.

IMG_2202


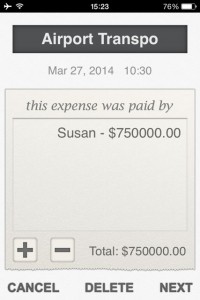
Inside the event I set up the participants. With that done, it was a simple matter to tap the expenses button and add a new expense.

IMG_2204

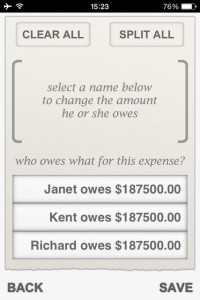
The app automatically split the cost evenly. I could change the amount that each person owed. This was especially useful if only certain people were involved in an event. As I removed certain people from the expense the app recalculated what everyone else owed.

IMG_2205

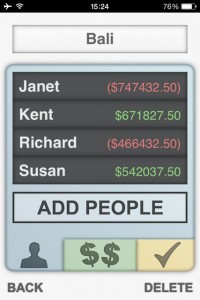
I could check totals at anytime.

IMG_2206


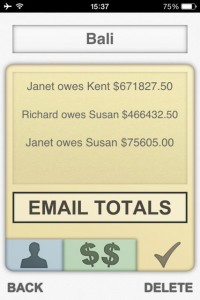
When we were done, I was able to e-mail an itemized account and a summary to each person. In the summary, the app had already figured out the quickest way to settle expenses. It showed who should pay what to whom.

IMG_2208

The app works so well that I was eager write to this blog post to share it with other people. When I went into iTunes, I was sad to see that the app is no longer available, at least not in the US app store.

I searched the app store for other apps with similar features. It looks like Splitty is the one which works the most similarly to Let’s Settle Up Later. It can even handle multiple currencies in a single event.

Screen Shot 2014-03-30 at 3.40.24 PM

If you give it a try, please let me know how you like it.


Editing Your Google+ Profile

Our school has been slowly rolling out Google+.  We started in the high school where both staff and students are able to have access to it.  The principal now uses their HS community for his daily announcements.  They  are using Google+ for their groups and clubs.  Last spring we also began using it with select cross-school committees.

One reason for our slow roll out was the challenges Google+ was creating for YouTube channels and working with photos in Picasa web.  Now that those are mostly resolved, we wanted to roll it out to the rest of the faculty and staff.

Our first challenge was finding a compelling use for Google+ and to clarify when to use Google+, when to use email and when to meet face-to-face. We created an ES Faculty community and we allowed everyone to join the community being used by our research and development team.

We did a soft roll out in December. We flipped the switch and let staff know it was there and that there would be training at a later date. That way, eager adopters could get started and the rest know why the new link appeared in their Google Apps.

Next year our primary and intermediate schools will merge into one larger school.  The ed tech departments have already merged, moving into a shared space in the elementary library.  For the Google+ training, we worked with intermediate staff in one session and the primary staff a few weeks later. It was efficient to have all of us in there supporting the faculty.

Prior to the workshops we sent out directions to enable everyone to set up their Google+ profile and tweak the notifications.

In the workshop there was confusion around Google+ circles since that is the main organizational tool in Google+ but we are primarily using Communities.  Some people were relieved to realize they didn’t have to follow everyone back or add them to circles.

Within the week, we were having questions regarding editing their profiles. Specifically they wanted to know where to change their avatar and turn of the photos and videos tabs.  I created the following short tutorial to assist them.


Editing Your Google+ Profile

Open your Google+ profile.

1. Click on your avatar.

2. Click View profile

Open your Google+ profile.

f4c05cce-8f71-4c48-afb0-e9573325b349.png

If you want to change which tabs visitor can view on your profile…

If you want to change which tabs visitor can view on your profile...

Click Home > Settings.

86a00e9e-743c-491c-bd27-1fe7d1289c9b.png

Scroll down to the Profile section.

Tick or untick boxes to control which profile tabs are visible to visitors.

a5f02a20-2270-40ce-8918-258b3dc3232b.png

Voicethread: Publish to Your Blog

When you are done with your Voicethread, there are a few more steps to get it ready for your blog.

If you are in your Voicethread, click on the gear in the top, left corner.

639ab378-9a78-4a1b-82c9-9007e7fa731f.png

Select Edit.

Select Edit.

Select Publishing Options.

Select Publishing Options.

Tick the first three boxes.

Then press Save.

Tick the first three boxes.

Click Playback Options

Click Playback Options

  • Change the wait to 1 second.
  • Tick all the boxes that you can tick. Don’t worry if you can’t tick as many as are ticked in this photo.
  • Click Save.
329052dd-8ac7-4a4f-8d32-0502f3d24b30.png

Click Embed.

Click Embed.

Copy the Embed Code.

Copy the Embed Code.

Go to Blogger.

Click the New Post button.

Go to Blogger.
Add the Title.Add the gr4 label.

Click the HTML Button.

Click the HTML Button.

Paste and Publish.

Paste the embed code into the text box.

Click the Publish button.

Paste and Publish.

View Your Blog Post.

View Your Blog Post.

Logout.

Logout of Blogger.

Logout of Voicethread.


You did it!

For an easier to print copy of this tutorial, click here.

Voicethread Setup for Students

Our school has the great good fortune to have a Voicethread account for each student within our school account.  This account follows our students from grade to grade. It plays well with our students’ Blogger blogs.

These student accounts were created during second semester last year.  Most classes did not get a chance to use them. This fall, the Voicethread iPad app went through an unstable period and so no one touched Voicethread all semester.  Now the app seems to be ready for prime time.

Our school Voicethread account is linked to our school Google Apps for Education domain.  As a result, if students login to Google Drive, they can find Voicethread in their Google Apps Palette.

monosnap-window title-4


All would be fine, except that our accounts were created last year and our students have new passwords this  year.  When students use the Apps Palette to go to Voicethread, this window appears:

monosnap-window title-7

While some students due remember their password from last year, we discovered there is no way for students to change their password once they are logged in.  It is better to have them update their password now.  Listed below are my directions for this process. I demonstrated the process to my students. Then, using the directions below, they were able to quickly complete the process themselves.  If you would like an easier to print version, click here.


Voicethread Setup

Getting Started

Login to Google Drive and Gmail.

Open the Apps pallette in Gmail or Google Drive.

Open the Apps pallette in Gmail or Google Drive.

Click More.

Click More.

Click Voicethread.

Click Voicethread.

8f286358-219a-4fec-8bca-b83ec23acd48.png

Enter your email address.

Enter your email address.

Go to your Gmail and open the message from Voicethread.

Click on the link in the message.

Go to your Gmail and open the message from Voicethread.

Enter your Google Drive password in both boxes. Click change.

You are ready to start using Voicethread.

From Presentation to Blogger on an iPad

[NOTE: An easier to print version of the tutorial can be found here. ]

Our iPad Mentor teachers really like using the Keynote app for student presentations. It is easy to use and makes visually pleasing presentations. Unfortunately, if they want students to move the presentations from the iPad onto the student blogs there is not a good workflow.

One option is to export from Keynote as a PDF, then pull it into the Explain Everything app. That works well when students want to record the narration that goes with the presentation. Transitions are lost in this method, and if the students don’t want to record anything this method doesn’t work. They can’t export out of Explain Everything unless each slide has been recorded on.

I am liking our new workflow much better. It uses the  Haiku Deck app which is free, easy to use, and has fabulous images available from within the app. We can use the free Blogger app to get iFrame code into Blogger. I have detailed the steps below.


Presentations: From iPad to Blog

This tutorial explains the smoothest workflow we have found for students to create presentations on their ipad and then save them to their blog. It only requires the use of free apps.

Students create their presentation in the Haiku Deck app. The app is easy to use and has its own collection of pictures so students can quickly create attractive presentations. Students publish to their blog using the Blogger app or by logging in on the web browser.

(Note: Haiku Deck is not a good option if each presentation slide needs to have many lines of text. The text will become too small for the audience to read it.)


Getting Ready

Before you can create presentations with your students, please complete the following tasks.

  1. Install the Haiku Deck app on the iPads
  2. Create a free class account on the Haiku Deck website: http://www.haikudeck.com/ Make certain to set it up using your class account (e.g. i108@sas.edu.sg).
  3. In the Haiku Deck app tap the ? in the bottom right corner. Look at The Basics and Tutorial.
  4. Create a presentation using Haiku Deck so you understand it well enough to answer student questions.
Getting Ready

In Haiku Deck with Students on the iPad

  1. Click the Sign In button. Enter your class account username and password. Save. This should only need to be done the first time you use the app.
  2. Click the + sign at the bottom of the screen to create a new presentation. Then tap edit to start working on the slide.
  3. If students do not finish in one class period, have them tap the MAIN MENU button in the top left corner to leave the presentation.
In Haiku Deck on the iPad

  1. When a presentation is finished, tap the Save and Share arrow in the top right corner of the screen. You may need to tap once on the screen to make that arrow appear.
  2. In the Save and Share window, set the privacy level to PUBLIC. You must select a category before you can press the Publish button. You may want to instruct students to make their first name be part of the title.
  3. When you press Publish your presenation will save to the Haiku Deck website.
0ed74177-6041-483d-90ca-d301641511bc.png


When the presentation is done upload, another Save and Share window will open. Tap the Post to Blog button.

104b0675-4164-436c-9568-4b62163c050d.png


Copy the embed code starting with <iframe src and ending with </iframe> . If they leave off any part of the code, it will not embed into their blog.

63e44506-6052-4680-a819-2f90467ed3a2.png

Embed in Blog

Open the Blogger app on the iPad.

Tap the View Blog button at the top of the screen.

Embed in Blog

Tap the Sign In button at the top of the screen.

Have students sign into their Blogger account.

5119db8d-8801-49c3-9d7a-dd1ac0720fc4.png

Create a new Blogger post.

5c8fda73-3a3f-447e-ba14-6c3fe05cb0da.png

  1. Tap the HTML button.
  2. Paste the embed code after the </div> tag.
  3. Press the Compose button. You should be able to see the presentation in the post.
d402ef77-bbda-4cf8-b6b0-2e821521e763.png

1. Add the post title.

2. Add the class label.

3. Press Publish.

1f001a2d-05d1-4c47-8748-19527be5b196.png